
The rack
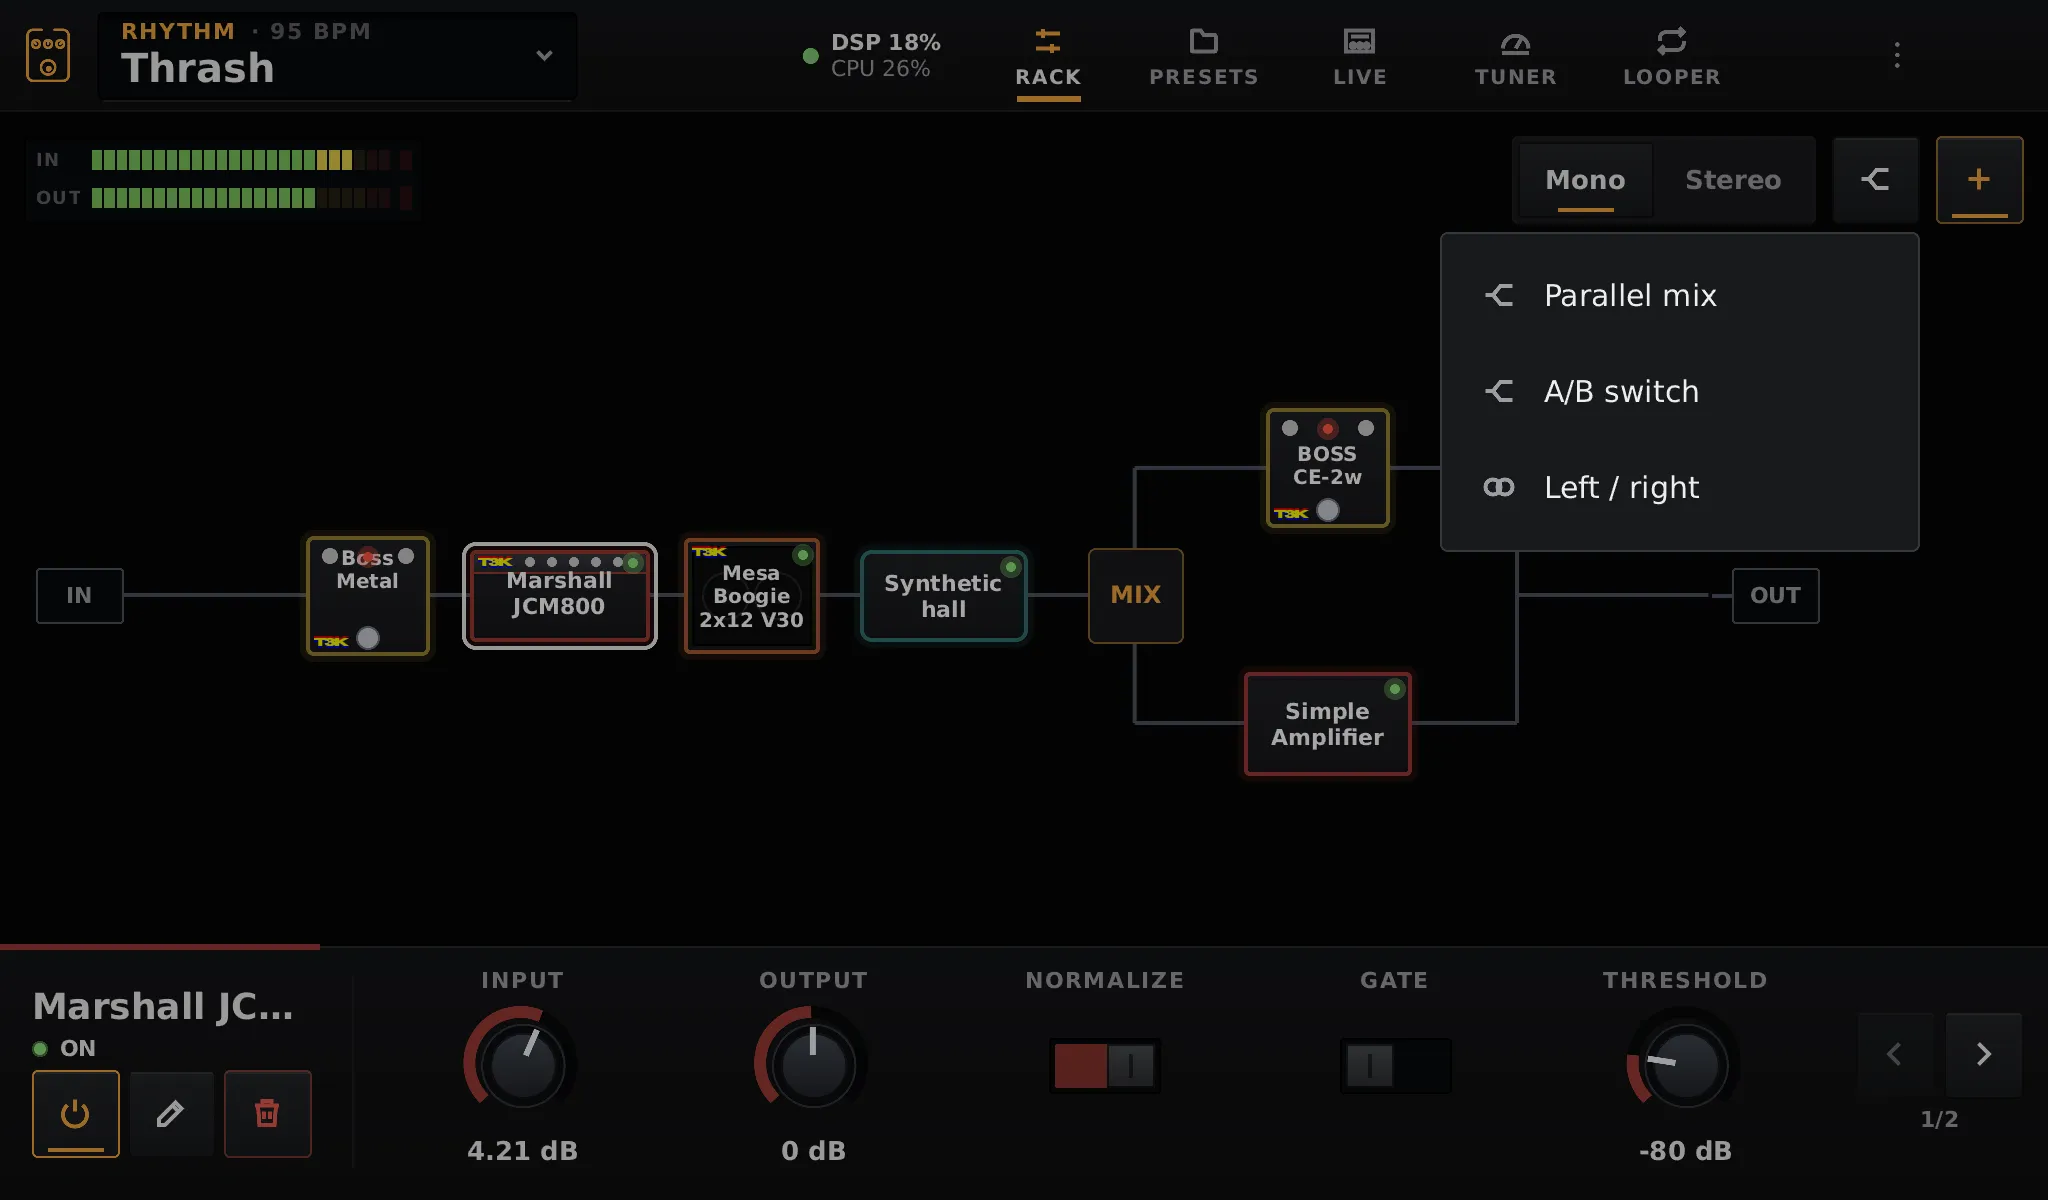
The rack is the main page: the guitar comes in at IN on the left and leaves at OUT on the right, through every block in between.
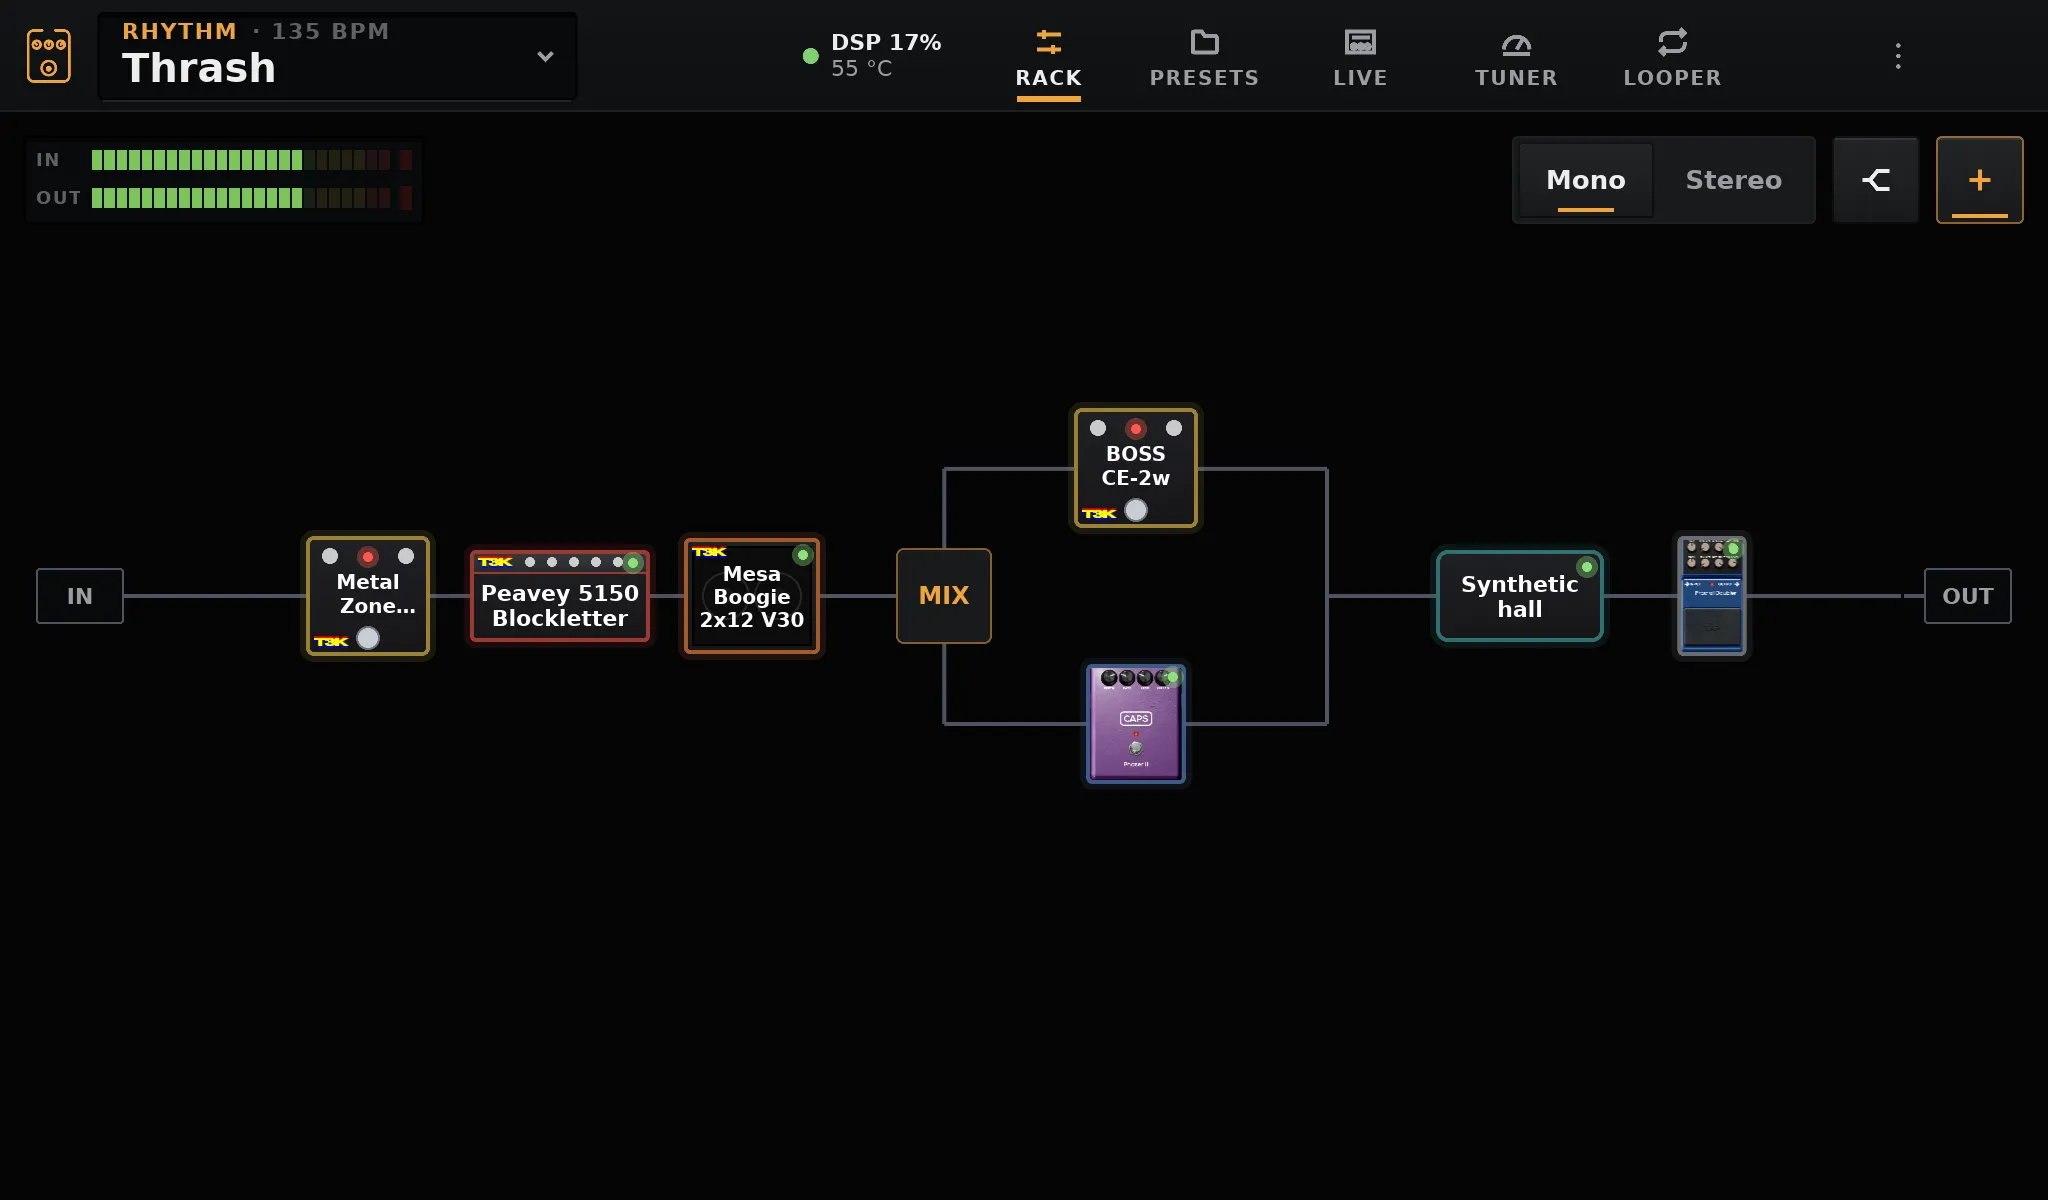
Blocks are drawn after the gear they stand for (amp head, combo, cabinet, pedal, reverb) and coloured by family: amps red, cabinets orange, drives yellow, reverbs teal, delays green, modulation blue. The LED of a block is lit when it is on. Blocks playing a TONE3000 capture carry its mark.
Adding a block
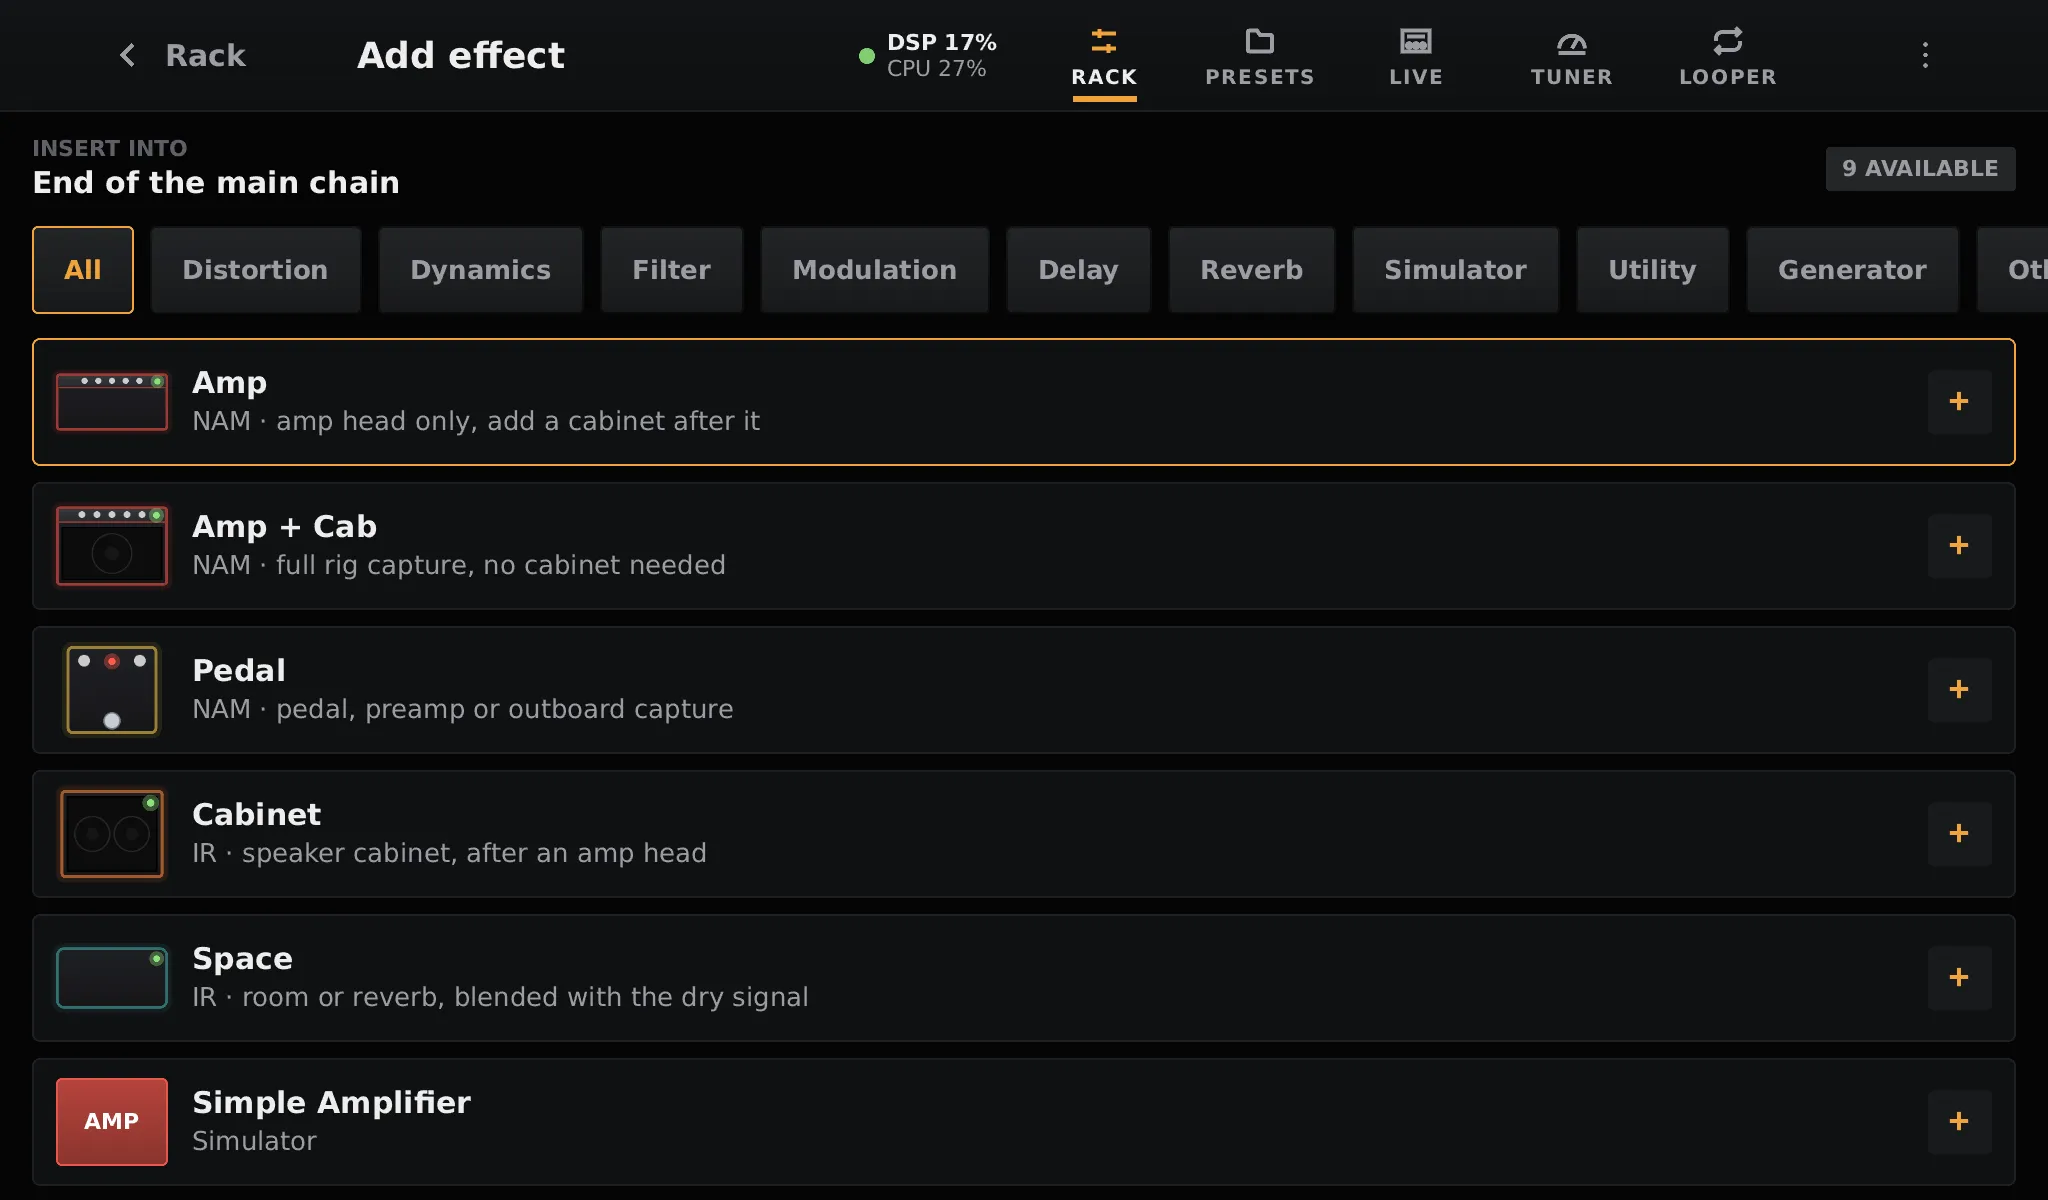
Section titled “Adding a block”Tap + at the top right. The list shows the built-in blocks first, then the LV2 plugins, sorted by category. Tap a line to add it at the end of the chain, then hold and drag it where you want it.
STORE, on the same page, opens the plugin store to install more plugins.
Quick knobs
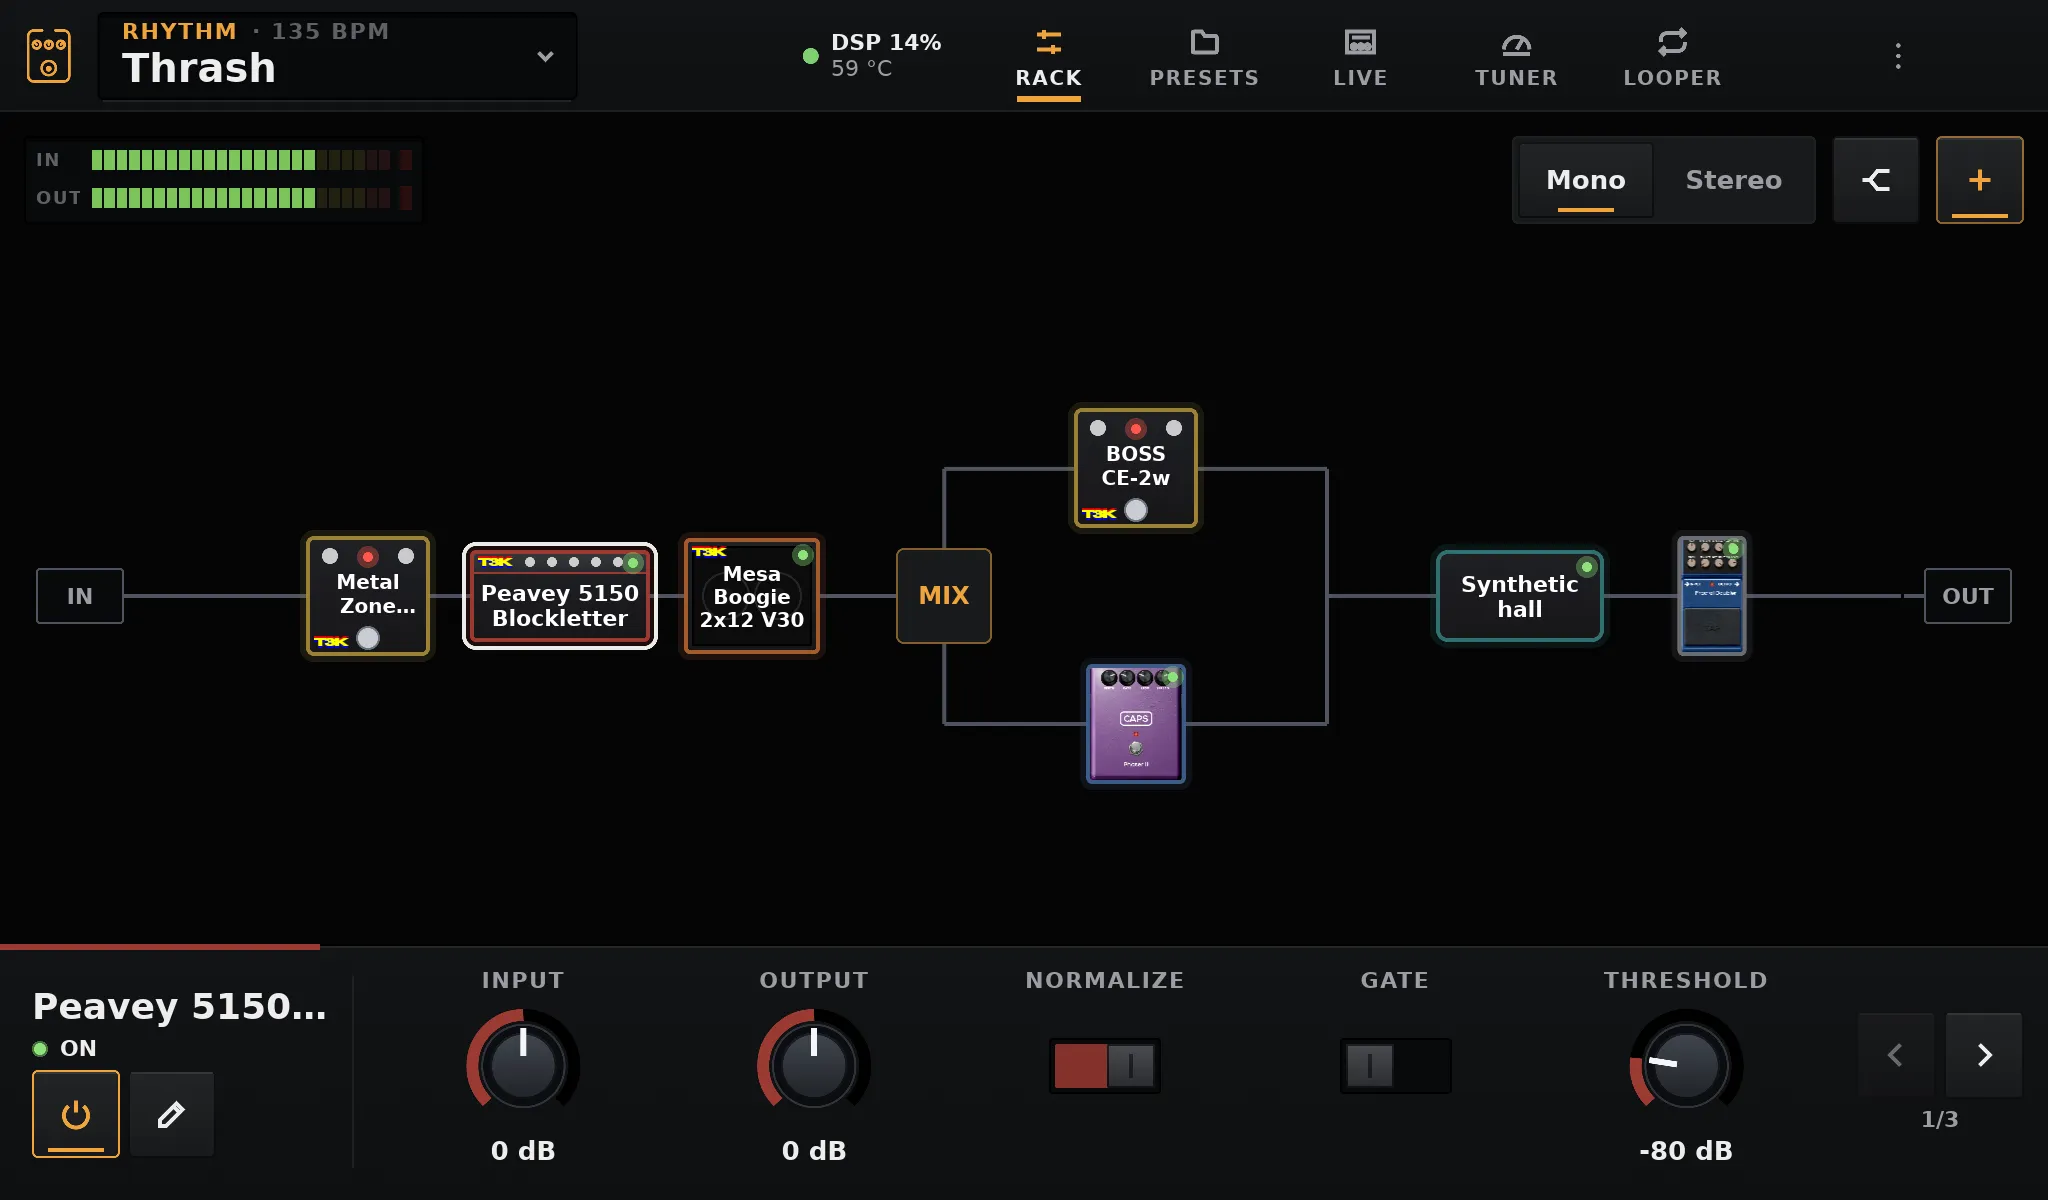
Section titled “Quick knobs”Tap a block to select it. Its controls show along the bottom of the screen, five at a time; the arrows on the right show the next ones. The buttons on the left turn it on or off, or open the full editor.
- Knobs turn with a vertical drag. Double tap a knob to put it back to its default value. Hold it without moving to go back to the value before your last change, to compare the two; hold again to swap back.
- Switches toggle with a tap.
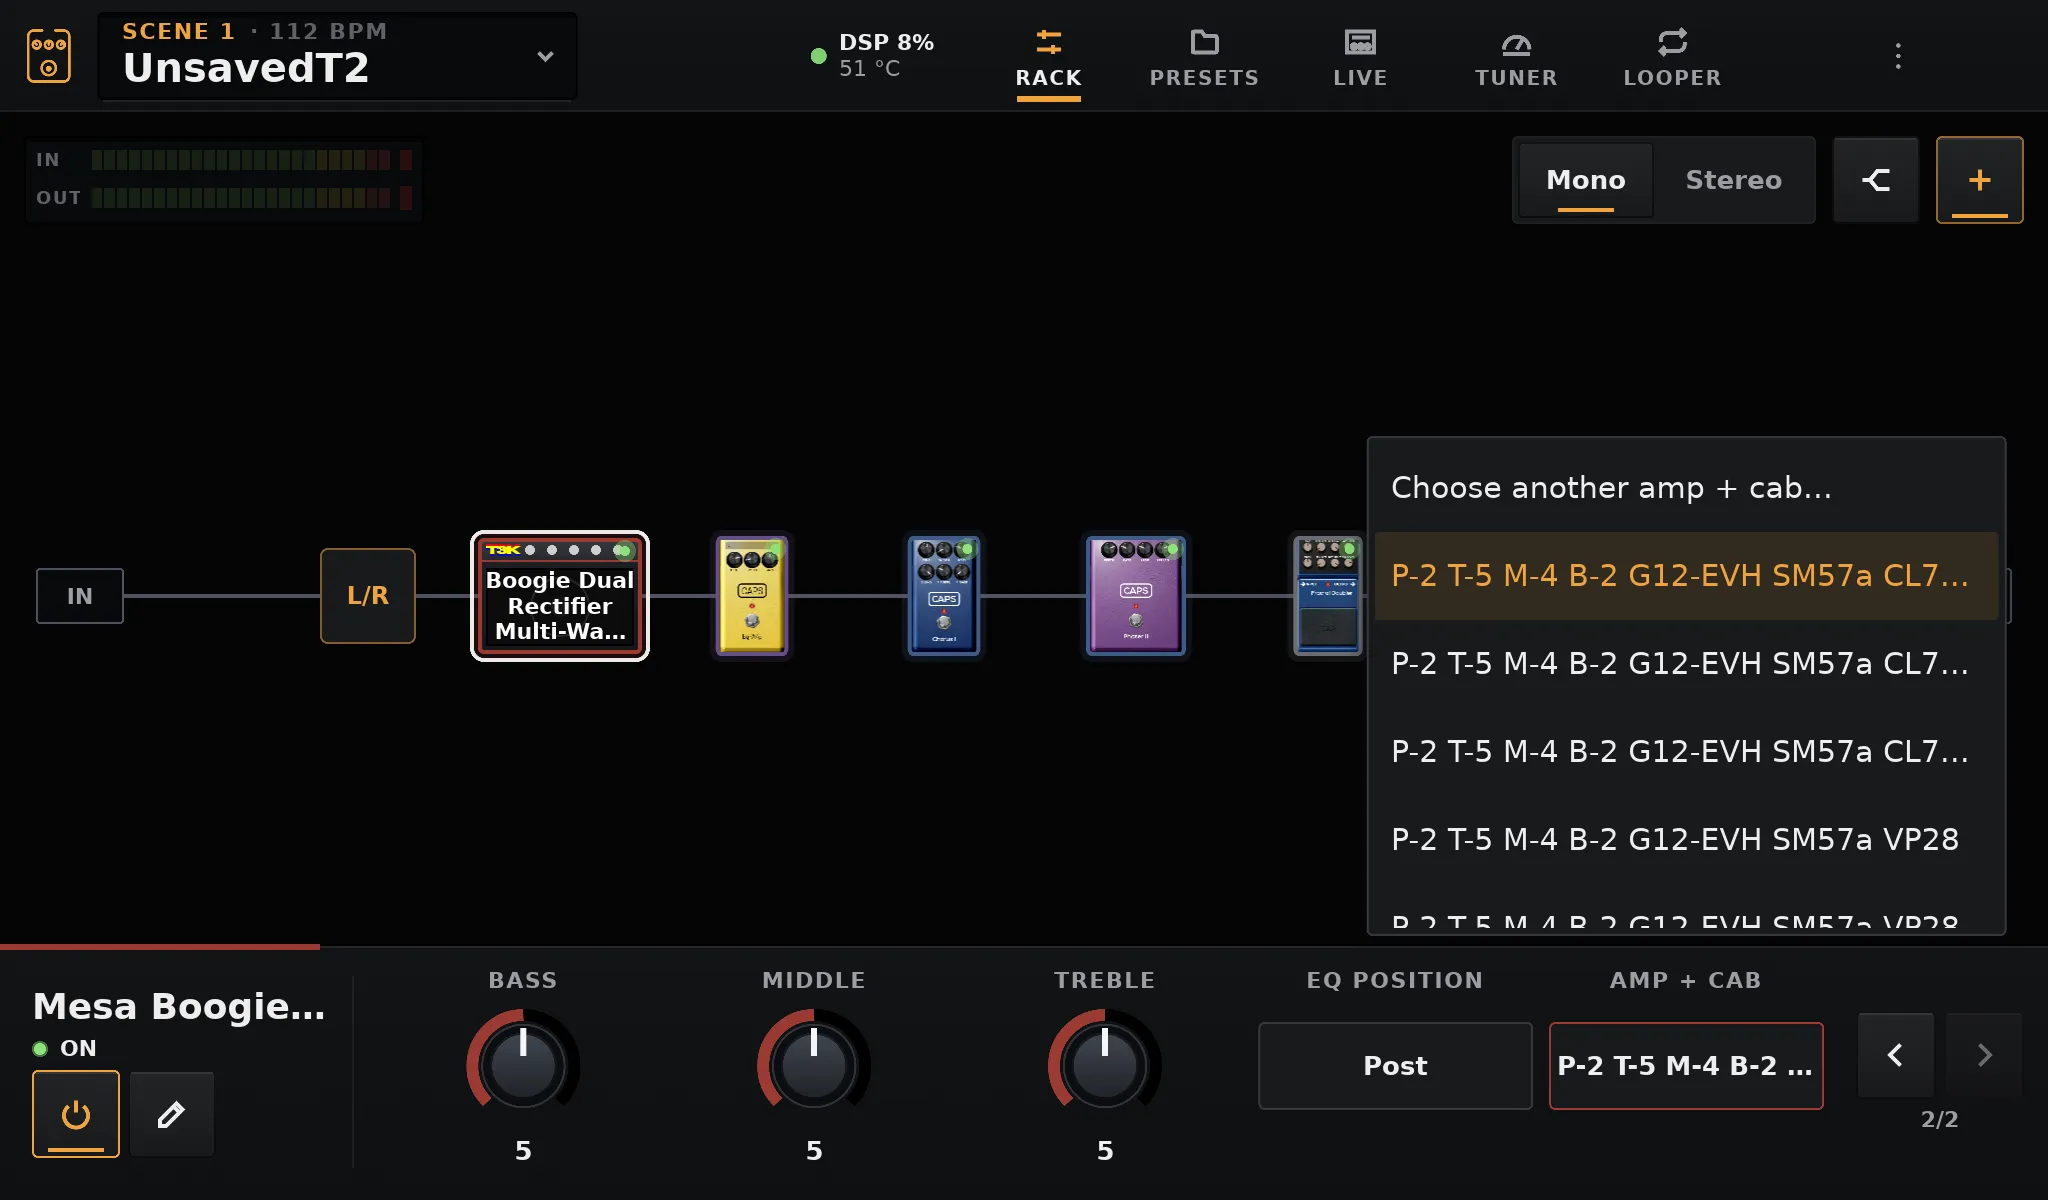
- Lists open just above the strip, next to the field: tap an option to pick it. The current one is marked. Tap anywhere else to close the list.
Which controls the strip shows, and in which order, is set with Arrange in the editor.
Every control has its field: knobs, switches, and lists, which open just above the strip so they stay near the finger. After the controls come two more fields:
- Presets: the plugin’s factory settings, when it has any. Pick one to load it.
- The model of a neural, impulse response or file block (Amp, Cabinet, Sample…): the other presets of the same tone to switch to, and Choose another… to open the full model chooser. With no preset to list, a tap opens the chooser.
Arrange sets which controls the strip shows and in what order.
Bypass and move
Section titled “Bypass and move”- Hold a block and release it in place to bypass it. Delays and reverbs keep ringing (see tails).
- Hold and drag it to move it anywhere in the chain, including into a split branch.
Removing a block
Section titled “Removing a block”- Hold and drag the block: a Remove target shows at the bottom of the rack. Drop the block on it when it turns red and says Release to remove.
- Or open its editor and use the bin at the end of the header.
The rack then shows Block removed with Undo for 8 seconds. Undo puts the block back where it was, with its settings and colour, as long as nothing else changed in between. It works for splits too.
Splits
Section titled “Splits”The split button, next to +, adds an empty split at the end of the chain:
| Split | What it does |
|---|---|
| Parallel mix | Both branches play, mixed together. Each can be panned in stereo mode |
| A/B switch | One branch plays at a time; switch it live, from a scene or from MIDI |
| Left / right | The top branch goes to the left output, the bottom one to the right |
Tap a split to select it: the panel at the bottom changes its type, switches A/B, sets the mix and the pans, and adds a block to its top or bottom branch. Its bin, at the far end of the panel, removes the split. Blocks can also be dragged into a branch, and splits can be nested.
A typical use of Left / right: a cabinet impulse response on one side for the front of house, and no cabinet on the other side for a real guitar cab on stage.
Mono and stereo
Section titled “Mono and stereo”The Mono / Stereo switch above the rack sets how the chain is played, and is saved in the preset.
- Mono keeps the whole path mono and sends the same signal to both outputs. Use it with a single amp or a single output.
- Stereo: the guitar comes in mono and becomes stereo where something makes it so: a Left / right split, a panned Mix split, a stereo plugin or a stereo impulse response. After that point, cabinets, spaces and mono LV2 plugins run once per side. Neural blocks, too costly to double, play the mix of both sides.
In the rack, a single line carries a mono signal and a double line a stereo one.
With an interface that has more than two outputs or more than one input, the Send and Return blocks (family Routing, at the end of the list) take the signal out of the chain to an output, or bring another input in. See Inputs and outputs.
The meters
Section titled “The meters”IN and OUT at the top left show the input and output levels. The red LED at the end lights when the signal clips: lower the gain of the interface, or the output of the last blocks.